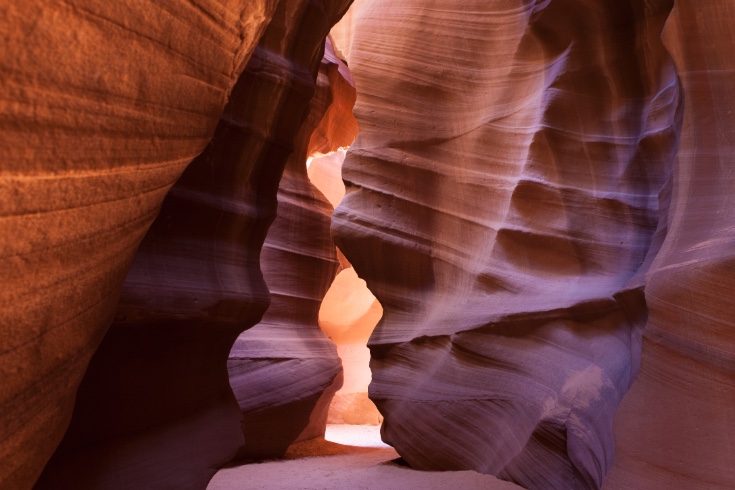
Upper Antelope Canyon
Southern Utah and Northern Arizona are home to dozens of slot canyons and none are more famous for photographers than Upper and Lower Antelope Canyons. Located on Navajo land just a few miles outside of Page, Arizona, tourists from around the world flock to these sites as they travel around the Southwest.
The two slot canyons are seperated by just a few miles. Upper Antelope, the more popular, is a relatively flat hike, then back out the same way. It gets very crowded in the summer. The canyon is up to 120 feet deep in places and is known for the beams of light than illuminate the inside of the canyon around midday. In addition to the regular tours, the Navajo operators run special tours for photographers where they ensure everyone is positioned in the right spots as the beams begin to appear. Squeezed tightly together are lines of people kneeling and others directly above them as the legs of their tripods intersect. The guides then throw shovels full of sand into the air to better highlight the beams and dozens of photographers start clicking away like mad. It's possibly the most stressful experience I've had photographing something yet I can't ever remember getting so many good images in so short a period of time
The canyons are formed when flash floods hit and over many thousands of years the runoff carves the soft Navajo sandstone into amazing twisted passageways. During really heavy storms water will fill the entire canyon. Since seventeen tourists were killed in 1997, warning systems are now in place to allow evacuation when rainstorms threaten the area, and emergency ladders can be dropped down if necessary.
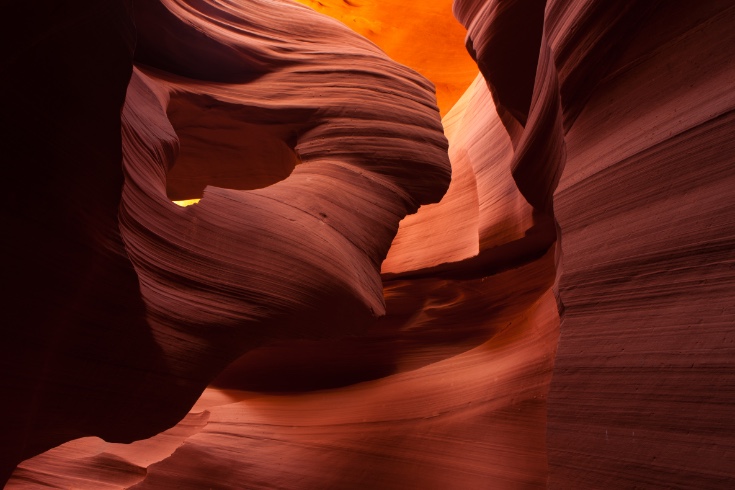
Lower Antelope Canyon
Lower Antelope Canyon is more fun to visit and a little more challenging as it requires navigating by going up and down a series of ladders. As a result, the crowds here are a little lighter than at Upper Antelope. It's a very narrow one way hike and though it lacks the dramatic light beams of Upper Antelope it easily makes up for that with plenty of beautiful colorful formations to photograph. I timed my visits here for first thing in the morning and had the canyon all to myself for quite a while until the crowds started trickling in. My excellent guide directed me around the best areas while he played Native American songs on his homemade flute.
Since the canyons are relatively dark, properly photographing them to capture all the details requires a tripod. But you can also get pretty good photos using a hand held approach or even with an iPhone (set it to chrome for the best results). The guides know the most photogenic locations within the canyons and will even adjust your camera settings and take pictures for you. So even if you are a terrible photographer you are bound to come away with some great images.
If you are planning a trip to the Grand Canyon, Zion or Bryce try to make time for a visit to one, or both of these incredible places. And for a similar experience without the crowds try nearby Rattlesnake, Owl or Mountain Sheep Canyons, or one of many other slot canyons in Southern Utah. You won't be disappointed.
Contact: Upper Antelope: www.navajoantelopecanyon.com Lower Antelope: www.lowerantelope.com